How to clean a slow sand filter

This topic has been covered here and on the accompanying websites before; but it is so important it demands reiteration.

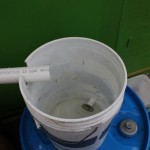
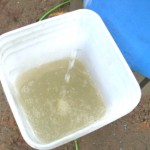
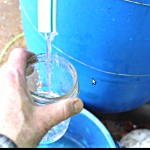
The simplest way to clean a slow sand filter is to use “wet harrowing”.  Stop the output flow (put a plug in the output pipe so nothing can flow out while you are cleaning the filter), then agitate the water JUST ABOVE THE TOP OF THE SAND until the water becomes cloudy; taking care to not disturb the top of the sand.  Then drain off the cloudy water by opening the wet harrow drain (the wet harrow drain is a drain valve right above the sand surface running outside the filter) to allow the cloudy water to drain off while keeping the sand surface covered with water by adding water to the filter input. Do this until the wet harrow drain water runs clear. Then close the wet harrow drain and open the output pipe and restart the filter. After wet harrowing, Let water run through the filter for at least 2 weeks before using the water. If the sand is slightly disturbed the filter will need more than 2 weeks to re-establish the biolayer (schmutzdecke) ( a coliform test might be a good idea if the sand is significantly disturbed.)

There seems to be a misconception that backwashing a slow sand filter is a good way to “clean” it.  Nothing could be further from the truth. Parts of the problem may be a misunderstanding of the process of backwashing; and lots of individual ideas of the meaning of the word as applied to the process.  For these purposes here, “backwashing” means forcing water back up through the gravel and  sand bed until the entire contents is fluidized. Backwashing a slow sand filter, will totally destroy it. Here is a simplified explanation of why: Gravity and biological processes form layers in the sand. The gravel at the bottom keeps the sand from flowing into and clogging the output pipes. The top layers of sand should never be mixed down into the bottom layers because the top layers have lots of microbes that eat the bad stuff. We don’t want the bad stuff OR the microbes that eat the bad stuff in the output water. The layers formed biologically and physically in the process of water flowing slowly DOWN through the sand keep the bad stuff and the helpful microbes away from the output water. Backwashing will mix all this stuff together and give toxic output; and, screw up the gravel layer at the bottom permanently destroying the filter’s operation. These filters don’t work with gravel and sand mixed all through the bed.  There are some biological filters that have a modified form of backwashing used to break up the schmutzdecke, but they are carefully designed and not practical for a DIY project.


Posted in slow sand water filter study and construction | 1 Comment

Diverter barrel size: 55 gallons or smaller?

There was a comment on one of the videos describing the diverter: Does the barrel have to be 55 gallons? The answer is no – with several caveats. The volume of water that is diverted depends on the condition and size (surface area) of the roof. The 55 gallon barrel will work for most residential roof surfaces – admittedly it is a bit large for some roof surfaces; however, sometimes it is possible to find used food grade 55 gallon barrels for under 20 dollars; or even free, so cost would be the determining factor. It has been my experience that the condition of the water that comes off of the roof will vary depending on the length of time between rain events, the intensity of the rain event, the temperature, the season of the year, and the surroundings. If you are 100 percent sure of all of the above mentioned situations, then the barrel can be any size you want as long as it is air tight except for a vent to allow for air to escape when water flows in. The amount of water diverted is really best determined by a “guess and check” procedure because all situations will be different. With lots of trees and abundant wildlife here, I prefer to divert about 3 gallons per 100 square feet. One gallon for every 100 square feet is the recommended amount. I have seen water come off of the roof in horrifically foul condition in the summer, and in the winter after a lot of rain, the water is nearly clear. If you are operating a slow sand filter, you want to keep the sediment to a minimum or the filter will plug up quickly. This is why I use a 55 gallon barrel.

Posted in slow sand water filter study and construction | Comments Off on Diverter barrel size: 55 gallons or smaller?

Slow sand filter construction

Update May 5, 2014:

This filter is still functional after 2 and a half years of operation. It was frozen solid this winter (until Feb. 2014) for 2 months. Temperatures were down to 10 degrees F. for several days, and below freezing day and night for weeks at a time. It has taken about 6 weeks of running to overcome the effects of being totally frozen. The re-circulation pump needed some cleaning but other than that, there was no visible damage to the filter system from the freezing weather here in western Washington state.

Update October 22, 2013:

This filter is still working after 2 years of continuous operation. The filter has been monitored regularly, and as a result,  a potential issue with the sand has been discovered. The bottom layer is too coarse, and takes up too much room. There should be more fine sand and less coarse sand to produce exceptionally clear water. If the depth of the.45 mm effective size sand on the bottom layer is reduced considerably, and the .25 mm effective size layer depth increased accordingly, this filter will produce higher quality water at a reduced flow rate. Reduce the depth of the .45 mm sand to a maximum of 6 inches, and increase the depth of the .25 mm sand as much as the bottom layer has been reduced, so the overall depth of sand is the same as the original design. Note that your flow rate will be reduced, but the quality of the water will increase.

Know that flow rate depends on the turbidity of your input water. Highly turbid input water will clog the filter very quickly. If you have any doubts about your input water turbidity, set up a small test filter in a 5 gallon bucket and watch the flow over a period of several months. You may need to set up a roughing filter.

Update June 30, 2013: There is a video describing the construction of the filter described in this post on YouTube.

A new filter has been put together here. This is Filter 4.

AS OF FEBRUARY 8, 2012, THE OUTPUT OF THIS FILTER HAS BEEN TESTED. THE FILTER IS WORKING.

IT WAS STARTED ON NOV. 13, 2011 AND MODIFIED ON NOV 22, 2011 THEN RESTARTED ON NOV 22, 2011; THEN MODIFIED AGAIN ON DECEMBER 14, 2011 AND RESTARTED AT THAT TIME. The tests were  done by an EPA certified lab here in the Seattle area. Note that it will be at least 3 weeks from Nov. 22 (weather permitting )before the tests go in and then another 3 weeks until the results are obtained. This means it may be the middle of January 2012 before we know for sure that this design works.

The input section of this filter is an adaptation of

the filter shown by ArashiNage Thank you ArishiNage!!! I suggest viewing his video – its excellent.

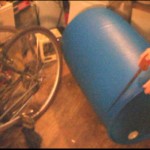
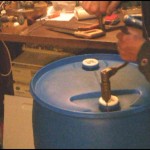
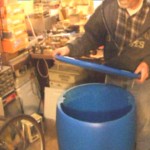
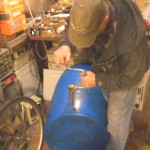
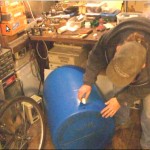
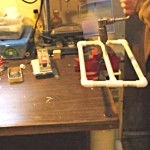
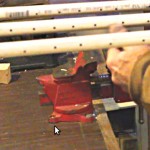
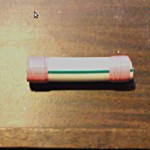
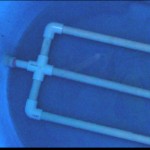
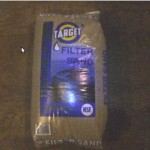
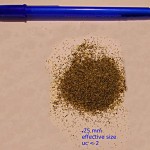
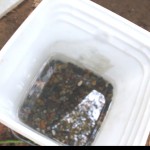
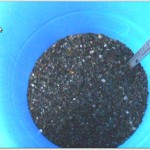
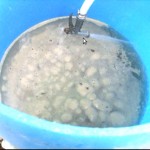
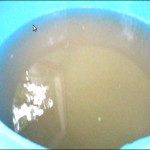
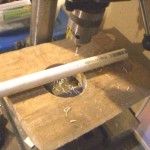
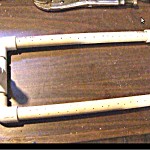
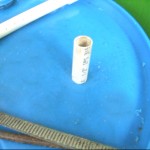
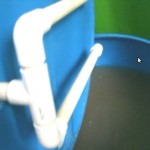
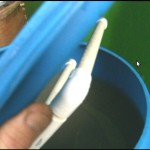
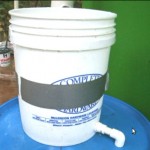
Below are some screenshots of the assembly procedure. The bottom level of sand used is .45 mm effective size, the top 3 inches is .25mm effective size. The pvc is half inch. The drill size for the baffle is a #45 and the size for the drain is 5/32 inch.

When you put a small slow sand filter together remember this: add the sand and gravel to the water – don’t add the water to the sand and gravel – fill the container first at least half way full. Here is why: as water is added to fine grain dry sand in a container, often small air pockets form (air pockets can even form in wet sand if it is just dumped in the barrel without water in there first). The sand does not get saturated with water in places and this will cause bacteria to die and horribly foul the filter. There will be a most horrific odor and the filter will produce toxic water. This will require shoveling out all the sand and sterilizing it and then putting it back in, or worse, replacing all the sand. Don’t even go there – just be sure the sand is added to water that covers it when it is added to the container. I have already been through this – and it is a huge pain to replace the sand in one of these filters. Its much easier just to have water in the container first. Don’t put chlorine in the filter – ever. Don’t clean the sand with chlorine unless you make sure to remove ALL of the toxic chemical before you put the sand into the filter. Chlorine will keep the beneficial bacteria from growing. Its ok to sterilize the container and pipes with chlorine, but be absolutely sure to get it all out before you start the filter. A better choice for sterilizing would be hydrogen peroxide – 3 percent solution – just don’t get it on your hands.  The bacteria on TOP of the sand and in the top 4 or 5 centimeters needs to stay on top – that is where it works to stop pathogens. “Clean” the filter by “wet harrowing” – agitate the water on top while avoiding direct contact with the sand surface, and drain off the resulting murky water while adding water to keep the sand surface covered. No need to remove sand and add new.

Posted in slow sand water filter study and construction | 6 Comments

Chlorine, THMs and HAAs (Trihalomethanes and Haloacetic acids) and other chemical water pollutants

Are there THMs or HAAs in the water you drink? Unless you are on a well, or use a slow sand filter, or do not get your water from a source that has been treated with Chlorine, you are probably drinking these every day. Most public water is “disinfected”. This means the bad microbes are killed – but not removed. ( Note that a biological sand filter (slow sand filter) actually removes bad microbes – a process known as purification.) Most public water supplies do not supply purified water. The chlorine and/or ozone that must be used reacts with the dead microbes which in turn produces the THMs and/or HAAs. These chemicals are cancer causing if consumed over long periods of time. The alternative, however is much worse. If drinking water is not disinfected lots of people will get really, really sick. Are there any other alternatives?

Now, if slow sand filtration was used in conjunction with some form of disinfection such as UV sterilization; the THMs and HAAs would be reduced considerably, if not completely eliminated because slow sand filtration removes disease causing microbes and organic matter from water. The UV sterilization is not needed all the time but is used as a precaution.

Read about THMs and HAAs here:
http://www.env.gov.nl.ca/env/waterres/quality/drinkingwater/haa.html
and here:
http://www.ewg.org/reports/dctapwater

Slow sand filters use “natural” water filtration,
http://www.shared-source-initiative.com/biosand_filter/biosand.html

very similar to the action of water filtration that occurs in a wetland:
http://techalive.mtu.edu/meec/module12/Chemicalfunctionsofwetlands.htm

( how do people think water is recycled “naturally”? does anyone bother to check? A search on the phrase “how does a wetland filter water” (without the quotes) brings up over 2 million hits).

From the top of the political machine, there are a whole basket full of excuses justifying the lack of attention to slow sand water filtration – most centered around cost, and “so called” antiquity and impracticably; however. . . . . . . . One city in the state of Oregon, has got it right:
http://www.cityofsalem.net/Departments/PublicWorks/Operations/Water%20Services/Pages/SlowSandFiltration.aspx

I have been there. We stopped there on the way to Las Vegas to fill our water containers. The best water I have ever had, outside of our own well water.

People are getting cheated (albeit not necessarily on purpose) daily by profit-centered water distribution system owners. Sure, the water is “safe” from a biological standpoint – usually. Without clean water, we get horribly sick, without water we cannot live, on a hot summer day, a person will be too weak to move after 3 days without water . . . . water is really,

really

important. Now if you are on a well, you already know all this, but what if the well runs dry, or gets polluted? Where we are here, about 8 years ago, developers drilled a huge well and ran a 12 inch line to several thousand new houses about 2 miles from here. As this massive pump has drawn water from the aquifer, the level in our well has gone down considerably, soon we will be out of water (when we replaced the well pump, the rust rings from where the water level used to be were obvious). The well driller told me it takes 7 years for the rainwater to seep through the sandstone to recharge the aquifer. I would imagine there are others in the same situation elsewhere in the world.

To compound the water pollution situation; “fracking” that oil companies are using to force petrol out of rocks has made some water wells useless by contaminating subsurface water. This is even worse than depletion, because that water, for human purposes, will NEVER be usable again. Think about that – carefully.
http://www.vanityfair.com/business/features/2010/06/fracking-in-pennsylvania-201006
http://www.foodandwaterwatch.org/water/fracking/

http://www.gaslandthemovie.com/whats-fracking

Donald L Marcus, Chris Bonds, Results of the reactant sand-fracking pilot test and implications for the in situ remediation of chlorinated VOCs and metals in deep and fractured bedrock aquifers, Journal of Hazardous Materials, Volume 68, Issues 1-2, 12 August 1999, Pages 125-153, ISSN 0304-3894, 10.1016/S0304-3894(99)00035-7.

And even this super right-wing source has concerns:
http://online.wsj.com/article/SB10001424052970203804204577013771109580352.html

Those involved in the profit producing aspect of fracking have only good things to say about it . . . I wonder where they get their water from and if they actually believe their sales pitch about their “wonderful new Green technology”?
http://www.hydraulicfracturing.com/Pages/information.aspx

http://www.energyfromshale.org/what-is-fracking?gclid=CIvRuJDRmqwCFUcaQgodZ0CkOg

Now, admittedly, our wonderful technology is highly likely to be able to purify the water that fracking has contaminated – distillation would probably work – but who pays for that and when does it happen? It certainly will not be the oil companies that pay for it, and it won’t happen until there is a dire need for water.

Posted in slow sand water filter study and construction | Comments Off on Chlorine, THMs and HAAs (Trihalomethanes and Haloacetic acids) and other chemical water pollutants

DIY first flow diverter (part 2 is done and available on youtube)

This is the parts list for the diverter. It does not show the 1/2 inch pipe, 1/2 inch threaded adapter, 55 gallon barrel, or the o ring that is used for the vent.  The inch and a half pipe that contains the table tennis ball must be schedule 20 , the inside diameter of schedule 40 pipe is too small for the ball to fit inside it. Part 2 of the video is done and posted on youtube.

Posted in slow sand water filter study and construction | Comments Off on DIY first flow diverter (part 2 is done and available on youtube)

Moss, roofing material, and roofwater harvesting: The roots of moss do not “eat away” at your roof.

As a response to one of my posts early this year, someone mentioned their opinion about the damage moss does to your roof:

August 23, 2011 at 1:40 pm (Edit)
“In the information on a first flow diverter, a comment was made that the water came from a composition roof with moss on about 30% of the surface. Any good real estate home inspector will tell you that moss does not grow on a good composition roof; moss requires a degrading surface that allows it to penetrate into the surface and hang on. If good composition roofs are problematic, moss covered ones should be of great concern for slow filter users.”

Moss will grow on any roof if there is enough moisture, and shade; and the moisture it holds is the most destructive part of the situation. Although it is probably a good idea to remove the moss from a roof; the moss, in itself does not “eat away at the roof”. Putting weed killer and moss killer, and pesticide on a lawn, or a roof to make it “look” nice is what is really “bad”. That stuff inevitably makes its way to the lakes, rivers, and oceans of this earth causing tremendous damage. There are contractors who will clean your roof without using toxic chemicals or super-high pressure water.

The moisture that the moss holds may freeze and cause damage to the roofing material by lifting and cracking the tabs on composition roofing. In the Pacific northwest part of Washington state it rarely gets cold enough to be concerned about this problem. Also, the moisture that moss holds can be destructive to the wood in the roof framing. That said, moss is not automatically destructive to all roofing in all cases. To assume that all moss on all roofing material is destructive to the roof by “eating away at the roof” is not the whole story. Moisture and sunlight are the two most destructive elements to be considered. Clogged gutters will cause lots of water damage, particularly if the water freezes under the roofing at the edge along the gutter. Direct sunlight and heat will destroy a roof very quickly. High quality roofing material and proper installation will do more to increase a roof surface longevity that will dumping poisons and other noxious chemicals on poorly installed roofing material or low quality (cheap) roofing material.

Moss is everywhere and is an important part of the ecosystem. As far as roofwater harvesing – moss actually takes nutirients out of water that passes over it – it removes stuff from water helping in the purification process. The links below confirm this.

From Oregon State University: moss does NOT have “roots” it has rhizoids, and they don’t “penetrate”. And furthermore, moss will grow on any compositon roof, degraded or not, if there is enough moisture and no poision, such as zinc or copper strips that are toxic to most plant life.

Moss does not damage cement

There are over 8000 species of moss and 6000 species of liverworts (that look like moss)
Don’t confuse moss and liverworts

Not all moss gets nutrients from the substrate on which it grows. Some mosses get their nutrients from water. The idea that any moss on a roof will “eat away” the roofing is not true.

From Southern Illinois University: At the bottom of the second paragraph:
“Near the base of the shoot, reddish-brown, multicellular rhizoids emerge from the stem to anchor the moss to its substrate. Water and mineral nutrients required for the moss to grow are absorbed, not by the rhizoids,but rather by the thin leaves of the plant as rain water washes through the moss cushion.”

Moss does not extract minerals or food from the stuff it grows on (from:  Australian National Botanic Gardens and Australian National Herbarium, Canberra.)


Posted in slow sand water filter study and construction | 2 Comments

Using roof water on a vegetable garden

I recently received an email regarding using “roof water” on a vegetable garden:

“. . . . I am writing about your article on roof water harvesting using slow sand filtration. I am working with a group on a community garden in Portland, Oregon and we are having a discussion about the safety of using roof water for our garden. Several members are worried about contaminates in the water coming out in the food we are growing.
While I know your research is on making roof water safe for drinking, I am hoping that you can point me in the right direction for research on the matter of unfiltered roof water for gardening. I have had a hard time finding any solid results one way or the other.”

To make a long story short, generally, I would not advise using unfiltered roof water on a vegetable garden. There may be exceptions to this, however. If you have a non-toxic roof surface and the air quality is always good in your area, and no animals, birds, or insects have access to your roof surface, and you use a first flush diverter; you might be safe using the water from it for a vegetable garden, but have the water tested first and keep in mind that any surface is subject to contamination at any time, and unfiltered roof water may be contaminated easily at any time.

The website slowsandfilter.org suggests some of the most common contaminants that should be tested for in roof water:  To start with – know what the roofing contains, what animals are present, the air quality, the time of year and the temperature range at the time of collection.

Again, I must stress that the research I have done does not and should not imply or otherwise suggest that any of the filters I describe can guarantee to provide “pure drinking water” in all cases.  Your local health department is the final authority on drinking water. The filters I have operating at the location of this study do work to provide clean water that could be used in an emergency situation and is used to water the vegetable garden. But know that all of the information I provide is free and there are absolutely no guarantees. Every situation is different and each owner of a water system is solely responsible for the water quality. Contamination can come from anywhere; and water quality will vary. There is no way anyone can assure purity of harvested roof water without proper testing at the site. In order to know what to test for it is necessary to carefully consider each situation for all possible contaminants.

As far as watering a vegetable garden; be aware that roof water can contain just about anything and its purity will likely vary considerably depending on what is on any particular roof surface. Unfortunately, to actually identify exactly each individual microbe or type of microbe that exists in a particular water source is nearly impossible. Some pathogens are particularly potent and it only takes a few of them to cause illness; and others do not cause illness unless consumed by the thousands. This whole situation is further complicated due to the fact that older persons, children, and people with weak immune systems can be more susceptible to the harm from infections. The World Health Organization (sometimes referred to as the WHO) has a study that explains this in detail. There are thousands of types of bacteria, viruses, helminths (microscopic worms), molds and spores that can be in water and some are very dangerous to people; and furthermore all water contains bacteria, viruses and other organisms that are not harmful. I suggest reading through this WHO document at the above link completely to gain a proper understanding of the nature of biological contamination in water. As for the chemical contamination; each source will be different. It will be necessary to know what the water comes in contact with in all cases to determine what non-biological contamination may be in the water. So to summarize; I cannot tell anyone what might be in roof water they harvest – it could be quite harmless, or full of pathogens and toxic chemicals. The FAQ page on slowsandfilter.org has most of the info I have found on roof water purity, along with links to scholarly articles that contain more detailed information.

All this does not mean that harvesting roof water is a bad thing or that having rain barrels to store roof water is bad. Quite the contrary. Instead of using drinking water from your public water supply for outdoor watering; irrigate flower gardens, and decorative trees and shrubs and non edible plants with non-potable roof water from a rain barrel – this conserves drinking water and reduces runoff during heavy rain events. If your roof uses commercially produced cedar shake roofing, check for copper sulfate and/or arsenic compounds in the runoff; and some composition roofing contains zinc compounds intended to kill moss, but these are exceptions.

Know that water is just about the best – if not the best – solvent known to exist. If you are far from any freeway or major highway, and there is no industry nearby, chemical contamination from air pollution may be minimal and biological contamination along with chemical contamination from the roofing material may be the most important concern. Cedar shake roofing almost always contains powerful poisons including arsenic and copper sulfate, and additionally cedar contains naturally occurring tannins and oils that are toxic (that’s why cedar does not rot as quickly as other types of wood). Lots of composition roofing contains poison that kills moss, along with petroleum hydrocarbons and associated sulfur compounds, that are toxic. Slow sand filters will not completely remove all toxic chemicals however my tests have shown that a slow sand filter will remove petroleum hydrocarbons. Galvalume roofing will supply fairly clean runoff, as will tile roofing, but still the water is only as pure as the surface, and there can be lots of nasty stuff on the surface of a roof.

Posted in slow sand water filter study and construction | 7 Comments

Concrete block cistern

Roof water harvesting is a good idea, but how does one store the water? A large container can be quite expensive and may require considerable space; and water is very, very heavy. If the container is to be above ground it must be able to support the weight of the water to be safe.  Consider this: a 55 gallon barrel is more than most people can even move when it is full of water (1 gallon weighs about 8.35 pounds    8.35 X 55 = 459.25 pounds).  One possible solution is a concrete block cistern built partially under ground. If a person has an area 15 feet by 15 feet and is able to dig down 3 feet, a good sized cistern can be built that will hold thousands of liters ( several thousand gallons ) of water safely.  We chose concrete blocks because the cistern location is not accessible to trucks or any kind of large petrol powered equipment. We did not want the forest trashed by putting in a road.  We have already been through some of the problems with concrete block cistern construction and this post may help others. Some of the advantages of a concrete block cistern are that it can be built slowly as money and time are available and there is no need for heavy equipment access, or setting up concrete pouring forms.  Do not use “pumice” blocks – they may also be called lightweight blocks – they are way too porous.

The concrete block cistern ( mentioned on slowsandfilter.org ) that holds water from filters 2 and 3 has finally been completed and found to be free of leaks. The project started out with the intention of sealing the blocks with Blue Max; but that did not work out. The temperature was too low and there was too much moisture in the ground for the sealer to cure. As it turned out, portland cement was the best choice. It is called “hydraulic” cement – that’s a fancy way of saying that it sets, cures and hardens best with water available – in fact it must have water available. Also temperatures of 50 degrees F and humid conditions are well suited to the curing and and setting of portland cement.

What we had to do was apply 6 coats of portland cement (“portland cement” does not mean it is made in Portland Oregon, or Portland Maine) to the surface of the concrete blocks. One of the coats had 15 percent #70 sand added.  The cement is mixed to a consistency of wet mud (like pancake batter) and applied like paint with a large brush. Note, however, if you can apply it with a roller it is too thin and contains too much water.  There were lots of inconsistencies in the construction as mortar was occasionally applied in a very unprofessional way.  This was partially due to the fact that we made the cistern fit in rather than ripping up tree roots and trashing the forest, so the thing was not built as a “perfect” square.

Cement of this type ( type II portland cement)  hardens well under water and the stuff we used is ansi 61 approved.  My advice to anyone trying this is to first make sure all of the mortar joints are fully filled on both sides inside and out. Seal both sides of the bricks, fill them with concrete and 1/2 inch rebar. Use at least 6 coats of portland cement and put 2 or 3 extra coats at each joint and around the bottom where the bricks sit on the concrete pad.

If you live in an area where there will be three or four weeks of hot days, absolutely no rain,  and low humidity, the Blue Max sealer might be a better choice than portland cement – but caveat emptor do not use the Blue Max sealer without reading the directions and following them exactly. Keep in mind that concrete absorbs moisture from the ground and it will prevent the rubber sealer from curing. My experience has been that if you allow that product to cure as indicated by the manufacturer, it is excellent and I would highly recommend it over portland cement; as it is somewhat flexible and will likely remain effective even if the concrete cracks. However if it does not cure correctly you will have a nightmare of a mess.

After all this, if I had it to do over I would use 4x8x16 solid cap blocks. For a 10X10 foot cistern 5 feet deep the cost for blocks would be about 545 dollars, and you don’t need to fill them with concrete, which will save lots of work and about 500 dollars. Also more mortar can be used between the blocks so that would add strength (and possibly) compensate for the lack of rebar, and mortar is easier to mix than concrete – try it!!  ( There is a mixer attachment that fits in an electric drill that will mix up a 60 lb bag of mortar in about 2 minutes easily if you use a 5 gallon bucket and exactly the right amount of water) . The whole project would be less expensive and easier to build if you are not a professional ( applying mortar to an 8x8x16 concrete block is not an easy task even if the mortar is mixed correctly ). The structure would still need to be sealed, but the blocks are not hollow. The only disadvantage I can see is that it would be harder to re-enforce the structure with rebar.

Posted in slow sand water filter study and construction | 2 Comments

Science, observations, experiments, results, peer review and the internet

Biological sand water filters (otherwise known as slow sand filters) are becoming popular. To all those people who have put up YouTube videos claiming to have built a slow sand filter that can be backwashed by forcing water into the output and churning up the sand from the bottom up – I say you are wrong; totally wrong.   There are hundreds of studies that have been done on these filters that show beyond any reasonable doubt that backwashing a biological slow sand filter will destroy it, and most likely mix harmful bacteria and helminths (small worms) far down into the sand layers resulting in horrifically toxic water output.

I hope people actually read some real studies with documented results before they actually try to build one of those filters and use it because even watering vegetables with the water from one of these ill-designed filters would be dangerous – after several backwash events the entire filter would be filled with toxic bacteria. The aggressive bacterial action occurs at the top of the filter because the sand forms its own layers due to the action of water and gravity the bad stuff is removed at the top – it needs to stay there along with the beneficial life – backwashing will mix the bacteria, including the nasty stuff too far down in the filter as the sand layers are disrupted. But don’t believe me, or the hundreds of others,  try it; just let sand sit for five or six months in a container with water flowing through it  and then try to dig it  out – it gets compacted and layered. Be very suspicious and wary of information you find on the internet. Some of it can be really great and some is just plain bs. And while I’m at it let me say, if anyone finds errors in any of the observations or test result interpretations on any of my sites, please let me know, I will respond and do my best to fix the errors – however; please back up your information with test results and documented observations or scholarly peer reviewed articles. Opinions or beliefs won’t cut it. and And again, let me remind readers: the filters I have tested and described on my sites and here are NOT recommended for producing potable water.

The internet is amazing; so much information is available. Unfortunately a lot of it is not what it appears to be.  When we are talking about science things get even more precarious. When you read a scientific article or something on the internet that purports to be science, always, if possible, follow the money trail and /or check to see if you can determine what the author’s motives are for sure. Check to see if the information is either peer reviewed, or backed up by citations of peer reviewed scholarly articles; or at the very least check to see if others have done similar work and obtained similar results.

Now where is the “money trail” for my stuff? That is covered on the websites. The funding is unconditional and private – there is no funding from any political, religious, educational or environmental group. What are my motives? I’ve already stated them: Water is not a luxury or something that should be marketed, patented and owned by multinational corporations or anyone, for that matter.Clean water should be freely available to all people. My study, hopefully, is a good starting place. I encourage others to improve on my study, but do so in an honest open way. Some have already done this – thank you!!

Posted in Uncategorized | Comments Off on Science, observations, experiments, results, peer review and the internet

slow sand filter, biological sand filter – nomenclature vs design

First let me say; it has become increasingly obvious that collaboration is a powerful tool for the development of technology. Just look at Android which came from Linux – the ultimate technology collaboration example. When Linux first came out, certain people laughed at it – now it is recognized world wide as the best system ever created (IMHO).

Now I would like to make some clarifications here.  My filter design  is covered by the Creative Commons license, which allows anyone to use and sell the design, or add to it and improve on it, with proper citations. I do not claim that the water running through my filter design is guaranteed to be potable in all cases.

With all due respect to Dr. David Manz, the filters I have built and have been testing for the past 4 years are not “Biosand” filters. They are modified slow sand filters, and so far the tests have shown that the design is functional and “cleaning” is not needed in the same fashion as other biological sand filters, as the use is different; and furthermore, the input water is roof water or well water that has very low turbidity and / or contains hydrocarbon pollution from the roofing material and local air pollution.  So, please, don’t confuse my design with the “Biosand” filter. It is not the same. The only close similarity is that both types of filters use biological action.

Posted in Uncategorized | Comments Off on slow sand filter, biological sand filter – nomenclature vs design