Update April 16, 2017:
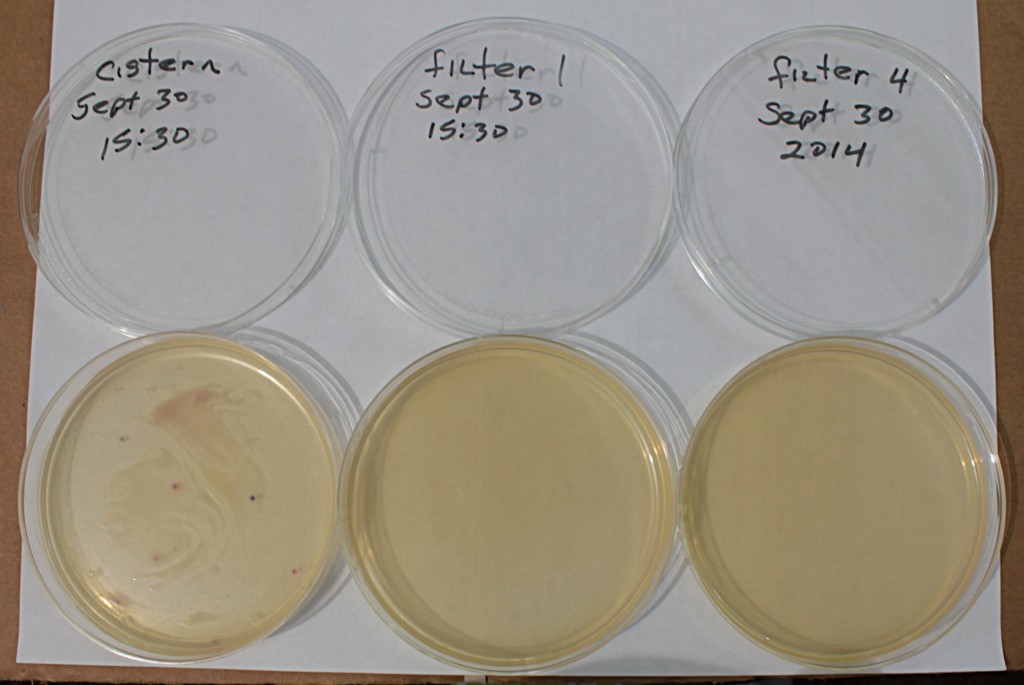
The 5 gallon filters, and the smaller 6 inch filter mentioned in this post DO NOT WORK. They either add biological contamination, or do not remove any biological contamination. Do not use them.
I am writing this to summarize what has been learned here in the past 7 years of designing, building and operating small slow sand water filters – thousands of hours and hundreds of pages of documentation. The details can be found by searching this blog, or accessing each of the water filter websites that are associated with this blog. This activity has had far more failures that successes. We’ve learned more from the failures.
The most important issues to consider when putting together a DIY small slow sand filter that will work to purify water follow:
1. Sand: Fine sand will provide better quality output at the expense of a very slow flow. Coarse sand will provide marginal quality output and a higher rate of flow than fine sand. A good compromise is to use .15 mm effective size sand and then provide storage for the output water. Never use “beach sand” from an ocean beach, there could be all kinds of contamination in it, including large amounts of salt and anything that can be tracked in by foot traffic. Know where the sand comes from to be sure there is no contamination. Mason’s sand, “play sand”, or commercial bagged sand is a good choice, but must be sifted first, and then washed until the water runs clear. The best, and the most expensive, is filter sand; processed specifically for water filtration and rated for potable water. The sand depth is critical. Very small diameter, shallow filters (4 to 5 inch diameter, and less than 12 inches deep) will not remove much contamination.
2. Container: We have used 55 gallon plastic barrels, 65 gallon plastic barrels, and 5 gallon plastic buckets. We also have one very small filter about 5 inches in diameter, and about 9 inches deep running here as an experiment. The diameter of a diy small slow sand filter is critical. As diameter decreases, flow rate must also decrease. See number 3 below for more on flow rate. Always be sure to rough up the inside of the container with sand paper. Make the lines of abrasion horizontal or random but NOT vertical. A smooth surface inside the container will allow un-purified water to slip down between the sand and the container surface. The 5 gallon filters we have tested here work marginally, but they do take out significant amounts of particulate matter. The biological tests done here on these small filters are field tests only; and are inconclusive at worst, and show some bacterial removal at best. The 55 gallon containers, and the 65 gallon containers work very well and the output of these filters has been tested by EPA certified laboratories with over 60 individual tests, repeatedly showing complete or nearly complete removal of ecoli, fecal coliform and coliform bacteria. The turbidiy of the output on the larger container filters is excellent, meeting or usually exceeding drinking water standards. These larger filters also remove hydrocarbons from harvested roofwater runoff from an asphalt roof.
3. Flow rate: A slow flow rate is absolutely necessary to maintain maximum purification. The slower the flow, the better the output. It is better to put up with a slow flow rate and have lots of storage, than to have a rapid flow rate just because it is convenient. These filters do not turn on and off like typical suburban homeowner’s plumbing fixtures supplied by public water systems. If a small diameter container is used (something like 5 or 6 inches), then the flow must be very, very slow like maybe 1 or 1.5 cups per hour; or there will not be enough contact time between the water and the grains of sand. This contact time is what facilitates the purification.
There are two ways to describe “flow rate”. One is by using numbers to indicate how fast the water moves through the sand bed (sometimes called “hydraulic loading rate”). The other way is to simply state how much volume of water flows out of the filter in a given amount of time. These are two very different actions. A basic explanation of flow rate is here. For the 5 gallon filter with .15 mm effective size sand, the flow should be no more than a drip like a leaky faucet about 1/2 to 3/4 of a gallon per hour and that is absolute maximum. For the 55 gallon, or the 65 gallon barrel filter, with .15 mm effective size sand, The flow should be about 7 gallons per hour (these flow rates are for a “ripened” filter) Note that all slow sand filters will start out with a much greater flow rate than they will have after running for a while. This is because the schmutzdecke gets thicker and presents more resistance to water flow.
4. Turbidity (the cloudiness of input water):
Water that is cloudy, muddy, or water that has lots of particulate matter in it will clog a slow sand filter within days, or hours. You can’t just dump mud puddle water into a slow sand filter and have it magically come out pure; and maintain a usable flow rate. Keep the water that goes in reasonably clear, pre-filter it with coarse sand first if your source water is turbid. A more detailed explanation of turbidity issue can be found here. If your input water looks like unfiltered lemon juice, it will clog your filter within a few days or weeks.
5. “Cleaning a slow sand filter:
Clean your filter by “wet harrowing” it. There is no need to replace the sand under normal operating situations. Even if you clog it up you can still use wet harrowing to “clean” it. To wet harrow your slow sand filter, temporarily plug the output pipe so water does not flow, then gently agitate the water inside the filter just above the top of the sand to stir up the excess accumulation of substance on the top inch or so of the sand. Do this until the water on top is filled with muck, do not forget to plug the output pipe or the mucky water will just flow right down and contaminate your filter (we made this mistake once) and then carefully drain off the mucky water and add fresh water. Do this without excessively disturbing the sand below about 1/2 inch. The less the sand is disturbed the better. Do this until the water is clear. Then open the output pipe and let the filter run for several days to restore the biological layer. Do not ever “backwash” your filter. You will destroy it. Backwashing is for rapid sand filtration only. If you backwash your slow sand filter, you will mix the gravel at the bottom with the sand and the layers of sand associated biological layers will be destroyed. This is a very stupid thing to do.
6. Recirculation:
During dry periods where no input water is available, always have a reserve of unfiltered input water, and some filtered water to mix and recirculate through your filter until the rainy season returns. Water must run through these filters continuously, or they will become dormant and will not filter water until they are run for several weeks or longer. If they are left un-attended too long you may have to start over with them.
7. Freezing weather:
These filters will not work if they are frozen. They work marginally at 32 degrees F if the water keeps circulating through them. Don’t glue the pipes, they will crack if they freeze. If the pipes are not glued, they will just be pushed apart by the expanding water, much like a freeze plug in an automobile engine, instead of cracking the pipes. The expanding water has to have some place to go. I’ve been through this for the past 7 years. The first year I made the mistake of gluing the pipes. They were destroyed.
8. Add the sand to the water:
When putting one of these filters together, put water in the container first, then add the sand as you go, keeping the sand under water at all times. This is to prevent air pockets from forming in the sand, and to allow for testing the container for leaks. It is easier to drain out water, than it is to shovel the sand out of the filter. If air pockets form, the filter will not work until the sand is removed, cleaned, sterilized; and then put back into the container. Don’t just fill the container with sand and then put water into it. Even if you have wet sand, air pockets can still form.
9. Wash the sand and gravel completely:
The more you wash the sand and gravel, the faster you will see a “clear” output from your filter. Wash the sand and gravel (before you put it into the filter) until the water comes out clear. This may take lots of water.
10. Don’t disturb the top of the sand:
The water input must not disturb the top of the sand ever. Keep the water flowing in very gentle. We use a “baffle” pipe assembly to do that.
11. Location:
A slow sand filter in a 55 gallon barrel is extremely heavy, over 700 pounds when it is full of water and operating. Be sure to locate and level the filter in a spot that will be its permanent location. It is nearly impossible to move this type of filter, without emptying it and restarting it, once it is set up.
Be sure the filter sits in a place where it is secure. The supports must be able to handle at least 2000 pounds safely. Moving a filter will disrupt the sand layers and cause the filter to stop functioning.
12. Know the basic reasons these filters work:
A slow sand filter works 3 ways: Biological action, Physical straining, and adsorption.
Biological (action) predation: All water, with the exception of medically sterilized water, and distilled water, has microscopic life in it. These microbes will grow in the slow sand filter if they are kept under water and oxygen and food are available. There is a mini-ecosystem that lives in these filters. This system results in the formation of a biological film, called a Schmutzedecke (German for dirt blanket) on top of the sand and to a lesser amount, further down in the sand. Disease causing bacteria, and viruses (bad bugs) are literally eaten by this collection of microbes in the filter. All that is left is harmless minerals. Most, if not all, of the small number of bad bugs that happen to slip by the schmutzedecke will die off as they move further down in the sand layer due to lack of available nutrients.
Physical straining: Particulate matter is strained out by the sand and the biofilm on the top of the sand.
Adsorption: This is a fancy way of saying that the sand grains actually can attract small particles and cause them to stick to individual grains of sand. This is similar to but, not exactly like , the way water actually sticks to itself due to cohesion and adhesion.